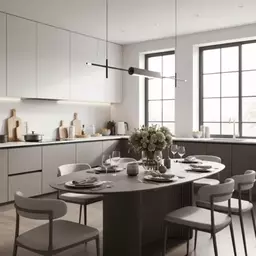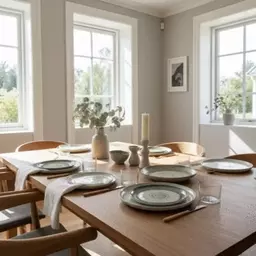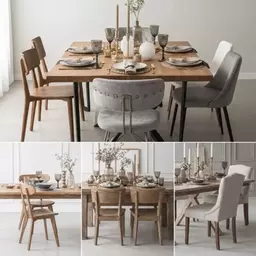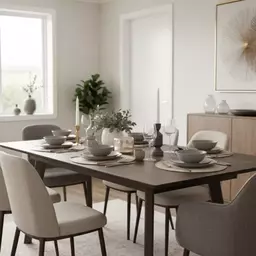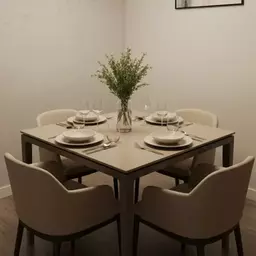
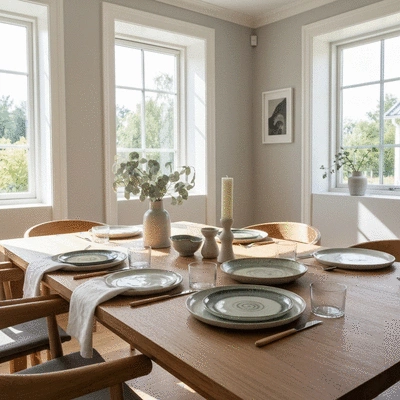
A dining table layout feels usable when the table fits the room, chairs can move without blocking paths, and the dining zone reads clearly from nearby spaces. At an inspection, buyers should be able to understand where people sit, how they move through the room, and how the dining area connects with the kitchen or living zone.
The best layout is not always the one that seats the most people. A smaller table, fewer chairs, or a different orientation can make the same room look easier to live in. The aim is to show realistic function without filling every available metre of floor space.
That matters because buyers spend real time assessing shared living areas. A 2026 analysis of more than 12 million digital property inspections found that open-plan living, kitchen and dining areas averaged 65.2 seconds per visit nationally. Victorian users spent 77.1 seconds per visit in those combined zones. The same research found strong attention on entrances, hallways and circulation areas, which reinforces a simple point: buyers notice how a home moves, not just how it is decorated.
Start With the Room, Not the Advertised Seat Count
A dining table layout should begin with the room dimensions and fixed obstacles. Seat labels such as four seater, six seater, or eight seater are useful for comparison, but they do not tell you whether the table will work in your home.
Measure the usable dining zone from wall to wall. Then mark anything that reduces the true footprint:
-
door swings
-
sliding doors
-
kitchen island edges
-
sideboards and cabinets
-
fireplaces
-
window seats
-
balcony access
-
main walking paths between rooms
The table has to fit within what remains after those elements are accounted for.
Current Australian furniture guidance commonly recommends about 90 cm between the table edge and nearby walls or furniture. That clearance gives most dining chairs space to pull back and leaves room for someone to pass. It is a planning guide rather than a building rule, but it is a useful starting point.
Do not measure the tabletop alone. Dining chairs extend beyond the table while in use. Armchairs, deep upholstered chairs, and wide timber chairs take more space than slim dining chairs. A table that technically fits can still feel cramped once all seats are occupied.
Before moving furniture, mark the proposed table footprint with painter's tape. Pull a dining chair into its normal sitting position. Then walk the paths people would use from the kitchen, hallway, living room, and outside area. This simple test reveals pinch points that a floor-plan measurement can miss.
If you are still choosing a table, Nordik Living's dining table shape selection guide is useful for comparing rectangular, round, square, and oval forms before you commit to a layout.
Protect Circulation Before You Add More Seating
A room feels usable when people can move through it without negotiating furniture. At an inspection, blocked paths make buyers work harder to understand the floor plan.
Start by identifying the room's primary route. In an open-plan home, that may run from the entry to the kitchen, from the kitchen to the backyard, or between living and dining zones. Keep that route visually obvious.
The most common mistake is placing a chair directly inside a traffic line. It may only protrude slightly when tucked in, but once someone sits down or pulls the chair out, the path disappears.
Use these checks:
-
Open every nearby door. A chair should not need to move so a door can open fully.
-
Pull out each chair. Check whether another person can still pass behind it.
-
Walk around the table in both directions. A layout that only works from one side often feels restrictive.
-
Test the busiest route. Carry a bag, washing basket, or serving tray through the space.
-
Look from the entry. The first view should show an obvious route into the room.
If a six-chair setup blocks movement, remove two chairs for the inspection campaign. You are not changing the table's actual capacity. You are showing the room at a furniture density that makes its circulation easier to read.
This is especially useful in compact apartments where the dining area sits between the kitchen and balcony. A four-seat arrangement can communicate more usable space than six chairs packed tightly around the same table.
Match Table Shape to the Geometry of the Room
The room shape should guide the table shape. Matching the two does not mean every rectangular room needs a rectangular table, but the geometry should make movement simpler.
Rectangular tables suit long rooms and linear open plans
A rectangular table usually works well when the dining zone is longer than it is wide. Running the table parallel with the long axis of the room can preserve clearer paths on both sides.
This shape also suits larger seating capacities because it provides long usable edges. If you regularly need six or eight seats, a rectangular table often uses floor space more predictably than a very large round table.
For larger layouts, Nordik Living's guide to choosing an 8 seater dining table covers table dimensions, chair clearance, and ways to visualise the footprint before buying.
Round tables can soften compact or square spaces
Round tables remove corners from the circulation zone. That can help where people pass the dining area on several sides or where the room is close to square.
A pedestal base can also make chair placement more flexible because there are no corner legs competing with knees or chair positions. However, a round table becomes inefficient when the diameter grows too large. The centre becomes harder to reach and the footprint can consume more width than expected.
Oval tables combine length with softer edges
An oval table can work well in an open-plan room that needs the seating length of a rectangle but has busy circulation near the corners. The curved ends create a softer boundary between dining and adjacent zones.
Oval forms are also useful where the dining area sits between two destinations, such as the kitchen and outdoor entertaining area. They reduce the visual severity of a long tabletop across a shared space.
Square tables need a genuinely square zone
Square tables are balanced in a square dining room or compact breakfast area. They are less forgiving in narrow rooms because they use equal width and length. Before choosing one, check whether all four sides can be used without blocking a wall, island, or doorway.
For a more detailed comparison of how shape changes flow in smaller homes, see Nordik Living's guide to choosing dining table shapes wisely.
Reduce Visual Weight Without Making the Room Look Empty
Visual weight is how heavy or dominant a piece of furniture appears in the room. Two tables with similar dimensions can feel very different because of their top thickness, base design, colour, chair style, and surrounding furniture.
This matters during an inspection because buyers are reading the available space as well as the furniture.
A thick dark tabletop with six solid high-back chairs can make a modest dining zone feel full. A table with a lighter finish, visible floor beneath the base, and slimmer chairs can expose more of the room's boundaries.
You do not need to replace the dining setting to improve visual weight. Try these changes first:
-
remove spare chairs that are rarely used
-
move bulky carver chairs away from the table
-
clear items stored under the table
-
reduce furniture on nearby walls
-
open curtains or blinds fully
-
remove oversized chair covers
-
centre the table beneath the light fitting only if it preserves circulation
-
keep the floor visible around the dining setting
A rug can help define a dining zone in an open-plan home, but it has to be large enough for chairs to move without catching on the edge. If the existing rug is too small, removing it for the campaign can look cleaner than leaving an obvious scale problem.
The same principle applies to pendant lights. A large low pendant may look dramatic in daily use but can interrupt listing photos or sightlines across an open-plan room. If the fitting is adjustable, raise it enough to clear the main camera and walking sightlines while keeping it visually connected to the table.
Use Smaller Dining Areas More Deliberately
Small dining rooms need stronger editing because there is less spare floor area to absorb a poor furniture choice.
Start with everyday needs. If two people live in the home and larger gatherings are occasional, an extendable table may present better than a permanent six or eight seater. The room can function at its smaller daily size while retaining extra capacity when needed.
Nordik Living's overview of dining table trends for small homes discusses compact and extendable formats that can suit limited dining zones.
For inspection presentation, consider four practical options.
Use fewer chairs than the maximum
A six-seater table does not need six chairs in every photo. Four chairs can reveal more floor, reduce overlap, and make the table edges easier to see.
Keep the spare chairs out of the dining room rather than stacking them against a nearby wall.
Try a round table in a square nook
A round table can create more forgiving corner circulation where a square or rectangular tabletop pushes into walkways. This is most useful when people need to pass around several sides.
Use a bench only when it solves a real space problem
A bench can reduce visual clutter because it has no high chair backs. It can also tuck fully under some tables. However, a bench against a wall may be awkward if diners have to slide in from one end.
For an inspection, use it only if the arrangement looks natural and leaves the route through the room clearer.
Do not force a formal dining zone into a circulation space
Some apartments have a small area between kitchen and living zones that is better suited to a compact two or four person setting. Trying to prove that a large table fits can make the entire open-plan area seem smaller.
The stronger presentation is the one that makes the floor plan easy to understand.
Set the Table for Scale, Not for a Dinner Party
A fully dressed dining table can help a room feel finished, but excessive place settings create visual clutter in listing photography.
The table should show scale without becoming the main subject of the room.
For photos, start with a clean surface. Add one low centrepiece, such as a bowl, vase, or small arrangement. Keep it below the main sightline across the room.
If you want place settings, use two or four rather than filling every chair. Plates can help a buyer judge tabletop depth and seating scale, but multiple glasses, folded napkins, candles, serving platters, and decorative layers quickly compete with the room itself.
Avoid tall floral arrangements. They can block the view between kitchen and living zones, split the table visually, and create a dark mass in wide-angle listing photos.
Also check reflections. Glass tabletops, glossy stone, mirrors, and windows can expose photography equipment, bright hotspots, or distracting objects outside the frame.
Before the photographer arrives:
-
remove mail, keys, chargers, and paperwork
-
wipe fingerprints from glossy surfaces
-
straighten chairs
-
align chair spacing
-
clear the sideboard top
-
remove pet bowls from the dining zone
-
open window coverings
-
switch on working lights
-
replace dead bulbs with matching colour temperatures
The goal is not to create a restaurant setting. It is to make the dining zone easy to interpret in one image.
Check the Layout From the Camera Position
A dining room can work in person and still photograph poorly. Listing images compress a three-dimensional room into a flat frame, so furniture overlap matters.
Stand where the photographer is likely to shoot from. This is often a doorway, corner, kitchen edge, or opposite end of an open-plan room.
Look for these problems:
-
chair backs blocking the table base
-
the table hiding the transition into the living room
-
a chair cutting across a doorway
-
a sideboard merging visually with the table
-
pendant lights obscuring the far side of the room
-
too many objects at the same height
-
furniture edges lining up awkwardly in the frame
A small shift can make a large difference. Rotating a rectangular table a few degrees is usually not helpful because it weakens alignment with the room. Moving it 10 to 20 cm, removing one chair, or centring the chairs more carefully often produces a cleaner result.
Take phone photos from the likely listing angles before the professional shoot. Review them as thumbnails. If the dining area looks crowded at a small size, simplify it again.
Prepare the Dining Table Layout for Inspection Day
Inspection-day layout should make the room easy to enter, understand, and move through. The furniture needs to support the floor plan rather than advertise how much furniture can fit inside it.
Start with the route a buyer will take into the dining area. Tuck chairs in evenly and leave the main circulation side as open as possible. If one chair projects into the route, remove it for the inspection.
Open blinds and curtains so the table does not sit in a dark zone. Turn on pendant or dining lights if they improve visibility. Keep the tabletop simple and low so buyers can see across the room.
Check the dining area from the kitchen, living room, entry, and outdoor door. Each view should show a clear relationship between the table and the surrounding zones.
If the room is small, do not apologise for its size by adding more furniture. Show the most credible everyday arrangement. Buyers can assess capacity more easily when the current layout is coherent.
For broader room sequencing and buyer-facing presentation, check this professional Australian home-staging contractor
A final five-minute check is usually enough:
-
tuck chairs in evenly
-
remove spare seating
-
clear the tabletop
-
open the main walking route
-
straighten the table with the room
-
switch on useful lighting
-
remove bins, pet items, and temporary clutter
-
check the room once from the entrance
The strongest dining table layout is not the most decorated or the most heavily furnished. It is the one that lets a buyer understand the room quickly and imagine using it without having to remove obstacles mentally.